April Showers Bring May Flowers... err, April Sun Brought May Showers?
This year has been surprisingly warm and then shockingly cold, but this gardening season has me excited for the summer long rewards of all my hard work, and into the fall and winter if I'm lucky!
Now if I can just shoo away the bugs, bees, grubs, slugs, and my friend Peter Cottontail. Then I'd feel 100% comfortable that my garden will grow beautiful vegetables that I can eat, without my friends eating them all first! I'm not a fan (at all) of any insecticides or pesticides, but I also don't want the bugs in my garden. So, I went online and looked for various natural home remedies to lure my friends away. I wish that I didn't have to actually kill any of my nature friends, but when push comes to shove, I don't mind seeing the grubs go to the other side.
First thing first, I had grubs in my garden. Being that this is my first year as a gardener, I thought those gross little grubs were maggots. Equally as gross, but I was incorrect. I researched many different methods on how to get rid of these little white worms, but would only decide to do two things: dig them up and toss them in a can to die and set beer traps over night. I didn't like the idea of putting nematodes in my garden, since they too can be troublesome. And I didn't want to try milky spores, well because I prefer a more natural method.
Beer Trapping Bugs: First, I'd recommend you not use a beer that you like, and since it has been so delightfully warm outside, I choose to use a can of Bud whilst I sipped on my ice cold Corona with a lime.
In order to set the traps correctly, you must choose the areas of your garden where you saw the most grubs, and if you dug up part of your lawn like I did, you'll find them near the edges of the grass. They like to snuggle up in the roots where the soft, nutrient soil is. Dig a hole deep enough to put your can in so that the top is level with the ground. Don't pack the soil tight around the can, let it lay loose so the grubs can crawl freely to the pool of beer. Fill beer 1" from the top of the can, so that the grubs will reach down for the yummy drink, fall in, and drown.
I didn't have much success with my beer traps with the grubs, but I did manage to attract other bugs.
Sugar Bee: My neighbour so kindly burnt a bees nest out of a tree in his yard, leaving hundreds of bees homeless, and searching for a new place to live in my yard. (So thoughtful of him!) Though I am a HUGE bee fan and know that our plants need them for pollination each year, I'm not so much a fan of bee stings. The bees were swarming my family members in the front yard, in the backyard, and we found a nest in our BBQ! This new bee living arrangement wasn't going to work out, and I had to find a way to detour them from building their new bee hive in my backyard.
Enter Bee Solution: Mix 1 c Sugar with 1 c Vinegar, pour in a 2l bottle, add water until 2" from top. Also, cut up a banana peel (slice thin strips) and insert into bottle, and mix well. (Again, be sure to keep liquid 2" from top.) Tie string around the neck of the bottle and hang from a tree.
This nifty bee solution will attract the bees into the bottle and drown them. The website I found this on said this mixture will not only attract bees, but all bugs. Something about the mixture will attract them to the bottle before anything else. We'll see how it works. I put it up about 30 minutes ago.
Pesky Peter Cottontail: I love Mr. Peter Cottontail and I'd love to keep him in my yard. But he's already beed digging up my garden, before I planted my potatoes and onions, and I started to scratch my head, why? Now that I know Mr. Peter Cottontail knows of my grand plans to have a lush, beautiful garden, I must give him something better or keep him out.
I have two solutions that I will try before I build a 2' fence to keep him out.
#1. Plant two rows of onions around the edges of my garden. Rabbits don't like onions, so it's an option. But I have limited space for growing and I don't need bushels of onions the entire year, as I'd like kale, cucumbers, carrots, radishes, lettuce, peas, and beans, among many other plants. So, I'm not too excited about this plan. Maybe when I have a large garden.
#2. Sow clover around my entire garden. They say rabbits like clover more than any other plant and they will stop to eat the clover before entering my garden. I'm hoping that is true because this is the option that I am going to try first. If this one doesn't work, I'll move on to #3.
#3. Build a 2' fence around my garden. I don't really want to do this, but if Mr. Peter Cottontail doesn't understand that it's my garden and not his, I'm going to have to put my foot down and build a fence.
SLUGS: I don't really mind slugs, but when it comes to my tomatoes... I mind slugs. I've looked up several different solutions to the slug problem, and most of them involve completely natural ways of detouring these little pests, but almost all of them injure or kill the slug. I guess I'm going to have to accept that I can't keep everything alive AND have my veggies too!
Options: Eggshells, coffee grinds, or fireplace/bonfire ash. All of these things, when you circle your garden or the base of your plants, will detour the slugs from climbing all over your veggies and eating them. The eggshells, when broken up and scattered, have rough edges and will slice into the slugs exterior and they won't tread there any longer. The same goes for the ash. The coffee grinds have some sort of chemical reaction with the slugs exterior, and again, will keep the slugs away.
I haven't tried any of these methods yet, but I have a slew of eggshells waiting, as I don't drink coffee.
Well, now that I have soaked up some sun, taught you a few natural methods about bugs and pests, and successfully caught 2 bees in my trap. I'm going to go check on my baby veggies and snap a few pictures for my next post.
Happy May!
Love,
Katie
"If at first you don't succeed, try, try again!"
Thursday, May 20, 2010

Thursday, April 8, 2010
Sharing Knowledge About Women's Health
Before reading on, this is a blog about my experience on Mirena IUD. I want to share this information with other women who are considering getting an IUD or have an IUD and want to know if other people are experiencing the same symptoms and side effects of Mirena. This is not my typical blog, but rather one that I feel is important information for women in regards to our health.
On December 10th, I decided to get the Mirena IUD, the inter-uterine device that releases Levonorgestrel, a hormone commonly used in combination with oral contraceptives (the "pill") and is similar to progesterone, as well as the main ingredient in the Plan B contraceptive. Levonorgestrel prevents pregnancy, which to me was easier than taking a pill every day and more cost efficient over five years time, which is the elapsed time that Mirena is good for. What I didn't expect was what my body went through in the four months time I had it.
But, before I get ahead of myself, let's go back to the decision of getting an IUD. I had been on the pill for about ten years, had a wonderful track record, and never had any problems remembering to take it every morning. That being said, it costs roughly $20 a pack per month. I knew several people who had the IUD and loved it, so I figured... why not? It saves me roughly $800 over the next five years.
Quick Math:
$20 a pak x 12 months = $240/yr = $1,200/5yrs.
OR
$380 for one IUD for 5 years.
That's $820 in savings. This, of course, backfired!
Prior to having the IUD inserted, I was advised to take several Advil (to "help" with the pain of the insertion) and told to administer two pills of Cytotec to dilate my cervix to make the insertion less "painful." The reason I put quotes around "help" and "painful" is because nothing could have "helped" with the pain that I felt because of the Cytotec pills. Read up on the side effects of Cytotec before using!! I experienced severe contraction pains in my abdomen. I was told by the nurse (and my mother) that the cramps and contraction like feelings are equal to, if not greater, than actual labour contractions.
LOVELY!
I forgot to mention that I had to insert these pills, I was directed not to take them orally, but rather inserting them is more effective. What my doctor failed to mention is the cramping would start at 3:30am the morning prior to my 10am appointment, and they lasted until 8pm that day. Basically, I had a 12.5hr labour minus the 9 months of being pregnant and wonderful little baby at the end of it to make it all worth while. Instead, I suffered through the next two weeks of on and off cramping. The type of cramping that you experience with a rather heavier than normal period, but I wasn't on my period. I wasn't even spotting. I would get very nauseous when I was experiencing cramps in the abdomen or lower back.
My body went through what I refer to as a shock period. It was adjusting to a foreign object in my body and deploying any means necessary to attack this evil thing that was altering my body system. Over the next four months I would experience side effects that scare the living hell out of most people. The types of side effects that you do not want to experience, the ones that make you question why you would put something in your body that you didn't know that much about to begin with.
Why did I get the Mirena IUD?
Because I trusted my doctor's medical opinion. Because my doctor said that every woman he has inserted the Mirena IUD in has had wonderful results. Because the little research that I did online on google showed that the side effects were minimal if any at all. Because I thought saving money was a good idea.
What side effects did I experience while on Mirena?
I'll give you my laundry list of side-effects:
-Headaches (migraines, where sleep was the only cure)
-Nausea (accompanied with my abdo and back pain)
-SEVERE abdominal pain
-SEVERE lower back pain
-SEVERE breast pain (to the point where wearing my bra was too much to handle)
-Dyspareunia (pain during intercourse)
-Acne (I felt like a 15yr old in high school, while I'm 29yrs old with little to no acne on a regular basis.)
-Decreased libido
-Irregular bleeding (this is to be assumed with Mirena, as your periods usually go away, but I'd have bleeding that would last up to three weeks at a time)
The scariest of all for me:
-In three months time I found three lumps in my breast!
After writing down all of the symptoms/side effects I had been having ever since inserting the IUD, I grabbed the handy pamphlet that my doctor gave me and read up on the side effects more carefully.
Risks of Mirena (In order from my handy pamphlet:)
-Circulatory Disorder (blood clots)
-Breast Cancer
-Irregular Bleeding
-Other drugs that interfere with Mirena (general information)
-Increased risk of a serious pelvic infection called pelvic inflammatory disease (PID)
The following side effects have been commonly observed in studies of women taking Mirena:
-Irregular Bleeding*
-Urinary tract infection
-Abdominal pain
-Pain in the muscles or joints
-Depression
-Headache
-Breast pain
-Genital discharge
-Ovarian cyst
-Vaginal infection
-Fibroadenoma of breast (benign breast lump)
-Acne
*A side effect that goes away as your body adjusts to Mirena.
After reading all of the above information, I called my doctor and made an appointment to consult him about the side effects I had been experiencing. Once I spoke with him and told him about my side effects, I was shocked at his answer, "Wow, you've experienced ALL of these? When did we insert this, oh December 10th. Wow! Well, all I can say is that some of these could be related to Mirena, but we can't say for sure. The only thing we can do is take it out and see if your symptoms go away. I'm just so surprised, all of my other patients on Mirena love it. You know some of these side effects will go away over time?"
I told him, "I just want it out!"
I was scared enough that my left breast had two lumps in it and the right had one. Not to mention that the handy pamphlet that my doctor gave me about Mirena says this about Breast Cancer in the side effects section:
"The most significant risk factors for breast cancer are increasing age and a strong history of breast cancer in the family (mother or sister). Other established risk factors include onset of menstrual periods before age 12, never having children, having your first full-term pregnancy after the age of 30 years, never having breast-fed a child, and daily alcohol consumption.
Some studies have shown that the risk of developing breast cancer does not appear to be increased by using progestogen-only forms of birth control like Mirena. However, more thorough studies are needed to confirm that there is no increased risk. You should notify your doctor if you notice any breast lumps. You should also discuss breast self-examination with your doctor. A yearly breast examination by a health care professional is recommended for all women."
The lines:
"More thorough studies are needed to confirm that there is no increased risk."
And,
Common Side Effects: Fibroadenoma of breast
Sort of stuck out in my mind as things that shouldn't occur because of birth control methods.
I actually had the IUD removed earlier today. I will be following up with the symptoms that I have been having and keeping an eye on those lumps in my breast. I am praying that they were caused by the Levonorgestrel and will subside once it is completely out of my system.
I had a strong urge to share this information for quite some time. I had been researching other women's side effects for some time now and found that I'm not the only one who has had a horrible experience on Mirena. Some women will be perfectly fine on Mirena, while others will not. What I'm trying to do is create an awareness about what could possibly happen and encourage more women to ask more questions to their doctor's about Mirena. Remember that doctor's promote the use of birth control methods, why else would pharmaceutical companies pay sales reps to visit doctors offices and try to get them to push the newest form of whatever cutting edge drug is available?
Do the research, ask questions, talk with your friends, family, and other women online who have used or are using Mirena. Remember that every woman is different and will have a different experience than the next, but take into account the risk factors when using Mirena IUD.
Love,
Katie
"It is health that is real wealth and not pieces of gold and silver." -Gandhi
Saturday, March 13, 2010
There's No Where Left To Hide
I may have this habit of constantly being on the lookout for something different, something unique, or something no one else has. I have always enjoyed making gifts for friends and family, but when I cannot think of something to make or if what I want to make is beyond my own capabilities, I search the ends of the Earth for the perfect gift. I have favourite shops in different cities and towns in different states and countries, but best of all... I can search the internet like it was on the main drag in my hometown.
I recently started up my own shop on Etsy about two months ago. I'm finding my footing with which items are going to be my bread and butter, but for now I'm trying a bit of everything to see what buyers are interested in purchasing. That being said, I've found there are several shops on Etsy that I continually go back to time and time again. They make up my list of favourite sellers, and their items take up the majority of the 20 pages of favourite items I have. I guess I drift towards a particular style, or I'm really good at hunting through 8,000 pages of items for roughly five shops that are already saved in my favourites!
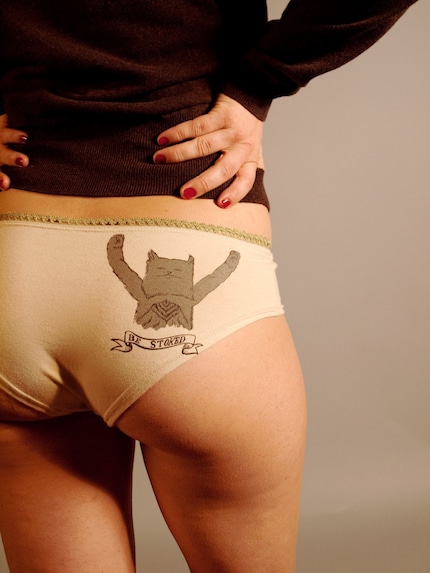
I'm going to list out several of my favourite finds. These are items that I cannot live without, and if I don't already have them, they're on my wish list. The first item isn't really "one" item. It's more like one item at the beginning of the month, for a year, type of item. Underwear of the Month is a club run by Recession, which was started by Avery and Leah (and friends) after the downturn of the economy in 2007. They've kept fashion, comfort, and affordability alive in West Oakland. This is one of my favourite finds and a must have. Who doesn't like getting a new pair of designer undies each month?? (For both women AND men!)
 The next gem I've found is Cocoricooo, and it is as unique as the name itself. I cannot pick a favourite item of theirs, as I practially want the entire shop!
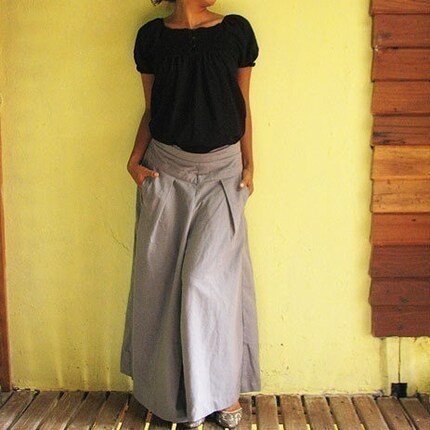
Cocoricooo is a group of four lovely ladies in Thailand. All of their clothing is handmade, hand embroidered, and hand dyed (if applicable.) They are passionate about their work and it shows in each and every one of their items.
This is definitely at the top of my list of favourites!! Much love for Cocoricooo!
 I am not much of a shoe girl. I know, how could I not be, right? I design and sew and would rather go barefoot than wear a pair of styling shoes. That was until I stumbled upon these beauties. Hydra Heart is a shop run by Molly, and boy do I love her! Each of the 100% vegan and earth friendly shoes are constructed after being hand drafted by Molly.
I fell in love with this pair of shoes, which I am getting in the ballet flat and heavy tread, so that I can wear them EVERYWHERE! Each set of shoes is custom designed to fit your feet. She takes exact measurements in inches or regular shoe sizes. Give them a try!
 It may appear to you that I spend way to much time on Etsy and other people's blogs, if you came to that conclusion, you are right!
I have found a whole new world of shopping, in which I can limit my shopping to local Etsy shops, Eco-friendly shops, or shops halfway around the world. Like Cocoricooo!
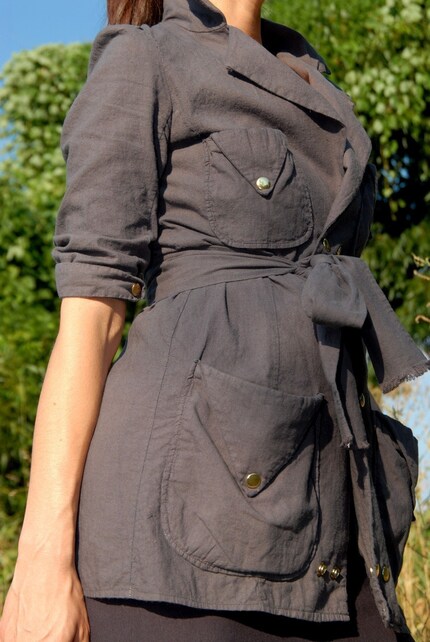
And every now and again, I stumble upon shops that incorporate my own passions. Pretty Birdie, by Stephanie Teague, shares the same passion for upcycling and recycling materials for her handmade clothing. I have been a fan of hers since I started on Etsy, and will continue to be a fan for many years to come.
Stephanie uses vintage, organic, cotton and hemp fabrics. She has a fabulous eye for stylish design, and I'm in love with many of her items!
 And lastly, Miss Unplastic herself, Evelyn Fields. I have worked for people who were on the radical end of environmentalism. From hang drying clothes, using cloth diapers, reusable wipes (I kid you not), cloth napkins, you name it... they were on it. Plastic bottles had no place in their house, but where they lacked, and Evelyn soars, is in UN-plastic snack baggies.
Evelyn shows us that there was indeed life before the birth of plastic. I hate plastic, and am thankful that there are people out there who agree with me. (You can also follow Evelyn's blog for more wonderful ideas.)
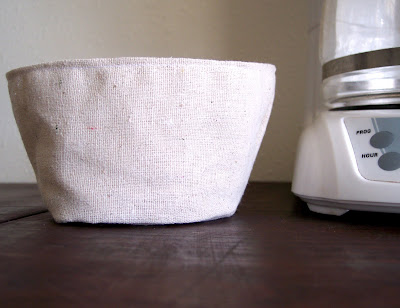
From unpaper napkins, snack sacks, bread bags, and rising cloths to sandwich bags, napkin rings, and reusable coffee filters. YES! Reusable coffee filters!! Evelyn does it all.
She brings a whole new life to unplastic, unpaper, reusable, and washable everyday kitchen necessities!
Thank you, Evelyn!
 There are many more items, more favourites, more MUST HAVE's, but for now I'll leave you with a brilliant idea to help keep our earth happy and healthy.
Reusable dryer sheets.
 Love,
Love,
Katie
"I'm not an environmentalist. I'm an Earth warrior." -Darryl Cherney
I recently started up my own shop on Etsy about two months ago. I'm finding my footing with which items are going to be my bread and butter, but for now I'm trying a bit of everything to see what buyers are interested in purchasing. That being said, I've found there are several shops on Etsy that I continually go back to time and time again. They make up my list of favourite sellers, and their items take up the majority of the 20 pages of favourite items I have. I guess I drift towards a particular style, or I'm really good at hunting through 8,000 pages of items for roughly five shops that are already saved in my favourites!
I'm going to list out several of my favourite finds. These are items that I cannot live without, and if I don't already have them, they're on my wish list. The first item isn't really "one" item. It's more like one item at the beginning of the month, for a year, type of item. Underwear of the Month is a club run by Recession, which was started by Avery and Leah (and friends) after the downturn of the economy in 2007. They've kept fashion, comfort, and affordability alive in West Oakland. This is one of my favourite finds and a must have. Who doesn't like getting a new pair of designer undies each month?? (For both women AND men!)
Cocoricooo is a group of four lovely ladies in Thailand. All of their clothing is handmade, hand embroidered, and hand dyed (if applicable.) They are passionate about their work and it shows in each and every one of their items.
This is definitely at the top of my list of favourites!! Much love for Cocoricooo!
I fell in love with this pair of shoes, which I am getting in the ballet flat and heavy tread, so that I can wear them EVERYWHERE! Each set of shoes is custom designed to fit your feet. She takes exact measurements in inches or regular shoe sizes. Give them a try!

I have found a whole new world of shopping, in which I can limit my shopping to local Etsy shops, Eco-friendly shops, or shops halfway around the world. Like Cocoricooo!
And every now and again, I stumble upon shops that incorporate my own passions. Pretty Birdie, by Stephanie Teague, shares the same passion for upcycling and recycling materials for her handmade clothing. I have been a fan of hers since I started on Etsy, and will continue to be a fan for many years to come.
Stephanie uses vintage, organic, cotton and hemp fabrics. She has a fabulous eye for stylish design, and I'm in love with many of her items!
Evelyn shows us that there was indeed life before the birth of plastic. I hate plastic, and am thankful that there are people out there who agree with me. (You can also follow Evelyn's blog for more wonderful ideas.)
From unpaper napkins, snack sacks, bread bags, and rising cloths to sandwich bags, napkin rings, and reusable coffee filters. YES! Reusable coffee filters!! Evelyn does it all.
She brings a whole new life to unplastic, unpaper, reusable, and washable everyday kitchen necessities!
Thank you, Evelyn!

Reusable dryer sheets.
Katie
"I'm not an environmentalist. I'm an Earth warrior." -Darryl Cherney
A Giant Thank You!
I owe two huge thank you's to fellow blogger and Etsy comrades.
The first is One Crafty Fox, you can find her Etsy shop at SizeMedium. I got to know Diana through e-mail on Etsy. We both use the Etsy forum to help other Etsy-ians, as well as look for help and critiques of our shops. Diana gave me a great idea for one of my blogs, a tutorial on how to colour highlight in photoshop. In return, Diana wrote a blog that featured my tutorial. I was very flattered and thankful. I owe a great deal of gratitude to Diana, as her blog inspired another blogger to feature my tutorial as well. Thanks so very much, Diana.
The second thank you is for Elizabeth Barret. She is an amazing blogger, and fellow Etsy seller as well, and she stumbled upon One Crafy Fox's blog about colour highlighting. She loved my tutorial and added it to her blog. (Scroll down to the Colour Highlighting blog) Again, flattered and thankful that I had made an impression on these two lovely ladies.
It is very special, for me, to be featured on someone else's blog. So thank you Diana and Elizabeth for creating a blog that included me in it. I am forever grateful.
Love,
Katie
The first is One Crafty Fox, you can find her Etsy shop at SizeMedium. I got to know Diana through e-mail on Etsy. We both use the Etsy forum to help other Etsy-ians, as well as look for help and critiques of our shops. Diana gave me a great idea for one of my blogs, a tutorial on how to colour highlight in photoshop. In return, Diana wrote a blog that featured my tutorial. I was very flattered and thankful. I owe a great deal of gratitude to Diana, as her blog inspired another blogger to feature my tutorial as well. Thanks so very much, Diana.
The second thank you is for Elizabeth Barret. She is an amazing blogger, and fellow Etsy seller as well, and she stumbled upon One Crafy Fox's blog about colour highlighting. She loved my tutorial and added it to her blog. (Scroll down to the Colour Highlighting blog) Again, flattered and thankful that I had made an impression on these two lovely ladies.
It is very special, for me, to be featured on someone else's blog. So thank you Diana and Elizabeth for creating a blog that included me in it. I am forever grateful.
Love,
Katie
Wednesday, March 10, 2010
A New Home
Hello ladies and gents!!
I have officially moved my blog to the wonderful blogger.com.
Very fortunately, I'm able to flex my creative muscles a bit more and showcase a few more of the ideas floating around in my head on this blog space than my previous one. I love Typepad, just wish the non-paying members had a bit more design creativity available, or just the ability to put in a mini-etsy.
Hope you enjoy the new place, I'll be decorating and dresing it up shortly!!
Love,
Katie
I have officially moved my blog to the wonderful blogger.com.
Very fortunately, I'm able to flex my creative muscles a bit more and showcase a few more of the ideas floating around in my head on this blog space than my previous one. I love Typepad, just wish the non-paying members had a bit more design creativity available, or just the ability to put in a mini-etsy.
Hope you enjoy the new place, I'll be decorating and dresing it up shortly!!
Love,
Katie
Monday, March 8, 2010
Editing Photos (Simplified)
On a personal note, I'd like to thank Nicole Pfeiffer for teaching me that I was editing my photographs the hard way, indeed! I've simplified this editing process so that you can create beautiful black and white photos with a splash of colour that much faster.
Back to business...
As an artist, I tend to be a perfectionist. This, of course is one of my worst habits. Usually, artists thrive on the imperfect because it is what makes their art different from another, but to me that is only something non-artists think. (And possibly just me.) We make our imperfections on purpose, and in essence... perfectly imperfect!
That being said, I took a photography course in college, and I failed. I failed miserably! I hated photography after taking that course, but that didn't last long. I realized I had a pretty cool camera from the course and knew the basics of how to use it. Just an FYI, if you are looking to take a course in photography and know nothing about how to use a manual camera, do not take biomedical photography, this will detour you from your passion to take moments in life and freeze them in a photo. Take photography 101 so you can learn the in's and out's of your camera and learn to enjoy the art of photography.
The one thing that course taught me that I'm beyond thankful for was Adobe Photoshop. I have long been a fan of Adobe Photoshop. It has been a tool I use for making my pictures brighter, darker, black & white, taking out an unnecessary car from my otherwise immaculate landscape, etc. Photoshop has also served as a comic relief tool for me by creating extreme one of a kind shots of friends and family members. We called those photos sharpie art. But my favourite has been taking a colour photo and making it black and white, while leaving some of the photo in colour.
My sister and my nephews are in the photo below and I did several things with this photograph, but most notably I changed the colour mode to black and white, while leaving their shirts in colour. (I also took out a neighbor's playhouse and boat, if you look close enough, you'll notice a little bit of my editing. This was a difficult picture to work with.)

I've been asked by friends, family, fellow Etsy-ians and strangers how I make these beautiful photographs in Photoshop. And my answer to me, is simple. Now of course, I have no idea if I'm doing my editing the "correct" way, but what I'm about to show you works for me. And, with practice, I hope it works for you too!
Keep in mind that I am using Adobe Photoshop 7, so your program may be different than mine. In regards to Photoshop, most of the programs have similar layer features, colour mode, and cropping tools. As well as editing commands using the Ctrl key.
1. First you need to select the photograph you'd like to use for this picture. It works best with a photo that has a bold or bright colour that you're going to highlight. Here is the photo I used:

There are two main things to keep in mind when you want to take a colour photo and make it black and white with a splash of colour, the first being: Crop your photo to desired size PRIOR to any of the steps below. This saves you from figuring out exact crop points later on. The second is choosing what pieces you want to keep in colour. After you do both of those things, proceed to the next step.
2. The very first thing you're going to do is select your Lasso Tool, also known as the cropping tool. You are going to want to select the Polygonal Lasso Tool. As this allows you to crop by clicking around an object instead of having to freehand crop, which is much more difficult. You change which Lasso Tool you are using by right clicking the mouse to get the drop down menu. For practice, click around on the photo until you're comfortable with how the polygonal lasso tool works.

3. Once you have this tool selected, I want you to highlight the object you want to KEEP in colour. After you have selected this object, I want you to copy it. You can do this by holding Ctrl C or by going to Edit > Copy.

4. The next thing you are going to do is convert the colour mode to grayscale. You do this by clicking Image > Mode > Grayscale.

5. After you have changed the photo into grayscale mode, you are going to go back and change it into RGB mode. This will keep the photo in a grayscale colour while being in a RGB colour mode, thus allowing you to paste your coloured object, which you already copied, back onto the grayscale photo but in colour. You change the colour mode just the same as you did when you changed it to grayscale, but this time select RGB mode.

6. After you change the colour mode back to RGB colour, you can paste your copied colour object into the grayscale photograph. You do this by holding Ctrl V, or Edit > Paste. Then select the Move Tool and move your copied colour object until it is directly over the area it lays in the grayscale photo. After you have positioned your colour object to its original spot, click Ctrl E, this Merges the layers together so that when you save the photo as a JPEG, it will save all of your hard work. You can also merge by clicking Layer > Merge Layers.
7. Lastly, ENJOY your beautifully edited photo!!

I hope you enjoyed this quick tutorial of Photoshop. With many trials, you will learn your errors and better, faster ways of doing things. I did just that with this latest blog and I'm able to share it with you. Thanks again, Nicole.
Happy Photoshoping!
Love,
Katie.
"Love will immediately enter into any mind that truly wants it." -A Course In Miracles.
Failure
The Burning Iron...
I have this one particular fabric that I absolutely love. It has a beautiful colour, shine and feel to it. It can be classy, it can be elegant, but it cannot withstand high heat from an iron. I know this, of course I know this, but when I finish a particular project I get really excited. The kind of excited that little kids get when they know they're going to McDonald's, you know the happy dance? That's the kind of excited I get.
So, I'm making a custom designed purse for a friend to take when she goes on walks with her dog. There are two front pockets that are easily accessible for doggie poop bags, treats, and on the inside I am putting several pockets for a cell phone, water bottle holder, and whatever else she decides to bring with her.
Again, being excited about the fabric that I love, I use it, which is the wrong fabric for this purse. So I decide this will be a sample purse and my friend can decide if she likes it or not, and I could just sell it to whomever loved it. So, everything is coming together perfectly and the pattern I designed was flawless. It was almost TOO easy. Then I got to the straps... and then I was stuck on the straps. I wasn't sure if I liked them, so I folded them in half for added strength and support, and I was happy. I sewed the interior in and was getting ready to iron it flat so I could make a stitch around the outside.
And that's where the deadly burn occurred, and the story ends!

Not Really A Pocket, Pocket!
I recently started making wallets, as I have an itch to make everything in sight, and I just had to try out a tri-fold wallet. I have my own wallet that I studied, I researched online how they're made, and I decided I would wing it. The first wallet I made was beautiful and relatively easy. Since I've quilted a little before, the binding on the edges weren't too difficult and I reused a magnetic snap to keep the wallet closed.
My second wallet is a WHOLE different story. The fabric I used is from the huge batch of designer fabric I was given, and it was one of my favourites. I saw it and immediately knew I wanted to make a wallet out of it. I held off for a bit, waited until I did a trail and error test on the first wallet, and was confident going into the creation of the second. The construction of the wallet was easy, I love making the credit-card pockets. Though, when I was making the change pocket portion, I started to run into trouble.
First of all, the reused zipper I had chosen was a pain in the butt! It took me twenty minutes to get it out of the previous purse it was embedded in. Obviously, this zipper did not want to part with its original creation. Once I pried it from the purse, I started to sew it to some muslin that I put interfacing on. I figured hell, it'll be easier to fold the pieces in when I put the zipper on, WRONG! The zipper moved, it was fussy, and basically was giving me sign number two that it did not want to be put in my lovely wallet!

Now, I'm not sure if you've already figured out that I shouldn't be able to put my hand THROUGH the zipper like that, but you're not!
There is supposed to be a backing that would hold the change in and where my pretty pale fingers are sticking out, which is where you would put your hard earned dollar bills. I hadn't even realized I did this and had put the wallet in a pile to be photographed with the small stack of iPod cases I had just finished. It was when my boyfriend's mom, Maggie, picked up the case and started examining my work. The two of us had been brainstorming ways to make the binding less bulky, which I've since figured out how to do... duh, add a quarter inch all around so you're not trying to squeeze 1' of fabric in less than 1' of space!
She held up the wallet, with her hand through the zipper like mine in the photo and said, "Isn't there supposed to be a pocket, in the pocket?" I started cracking up and was thankful that I hadn't put it up on Etsy to sell! How embarrassing that would have been!!
But alas, I've learned trial and error only makes you a better designer and sewer. I've since taken apart my purse and put in a new strap. (Burn Free!) And unfortunately, I've been staring at my wallet, with my favourite fabric holding it together, already regretting the time it took to make it, to have to take it apart and fix it! But I will.
"If You don't like how things are, change it! You're not a tree."
Love,
Katie.
Subscribe to:
Posts (Atom)